How to install solar power system for home? Can you do the solar power installation by yourself? Labor and related costs account for more than half of the price of the average home solar installation. You can install by your self and buy the product from China factory directly.
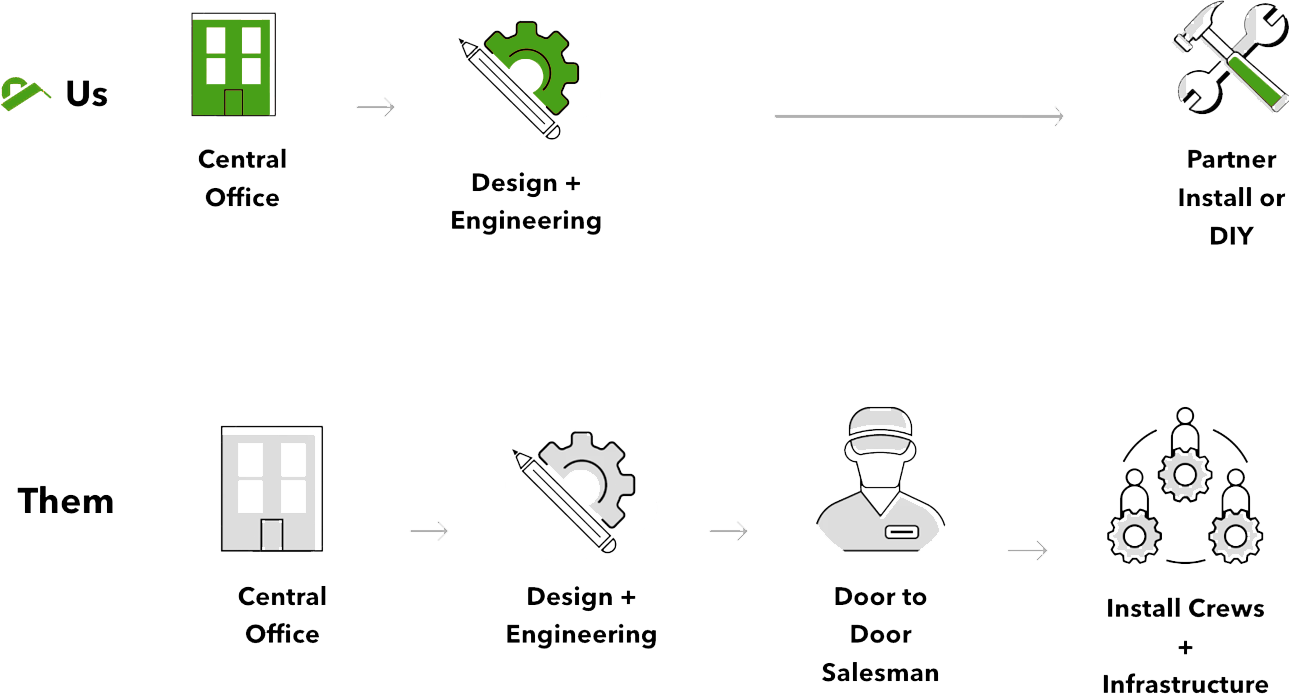
You can save thousands of dollars with this user-friendly manual.And this blog is for a 5kw off-grid solar power system. Your system may be 10kw, 20kw, 50kw. The principle is same.
Through detailed directions and step-by-step photos, you can start to do it by yourself or by your electrician.
This comprehensive DIY guide covers everything from assembling rooftop racking or building a ground-mount structure to setting up the electrical connections and making a battery bank for off-grid systems.
Preparation
In this blog, we will use a 5kw off-grid solar power system as an example,need to prepare:
GREEN POWER 1*5Kwh Home Battery,
GREEN POWER 1*5Kw Solar Inverter
GREEN POWER 12*400W mono solar panel (PERC Shingled solar modules)
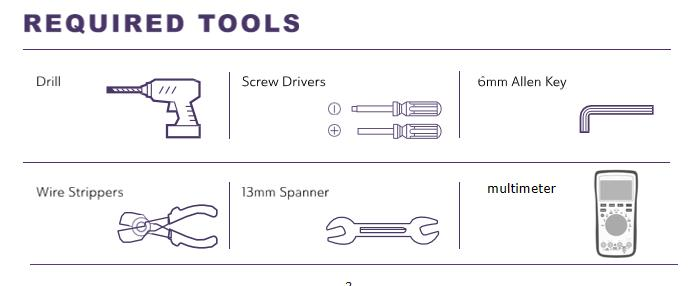
Required tools
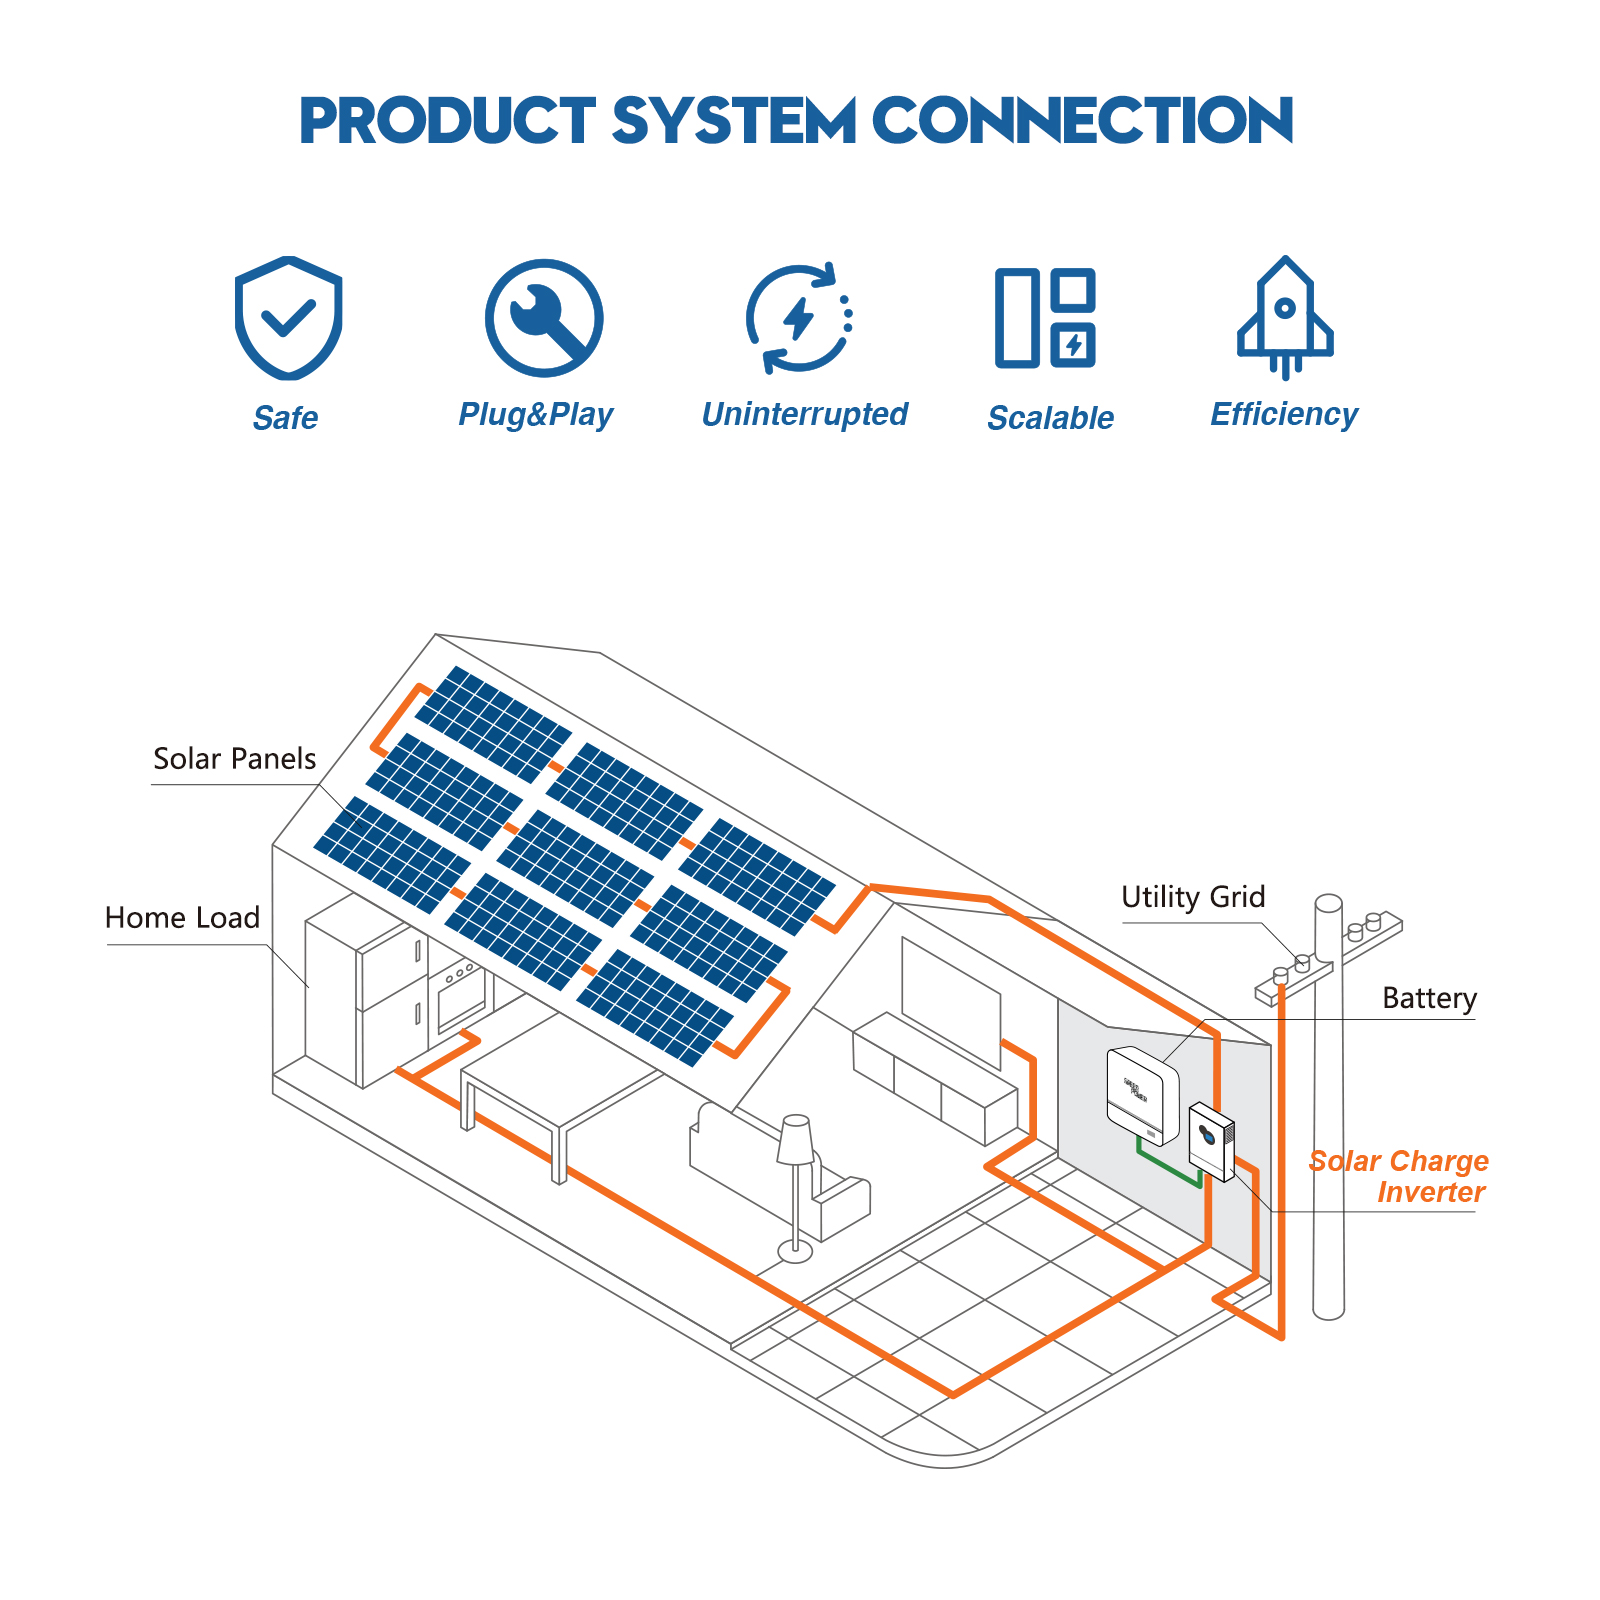
Connection drawing
Step 1. Mount Installation
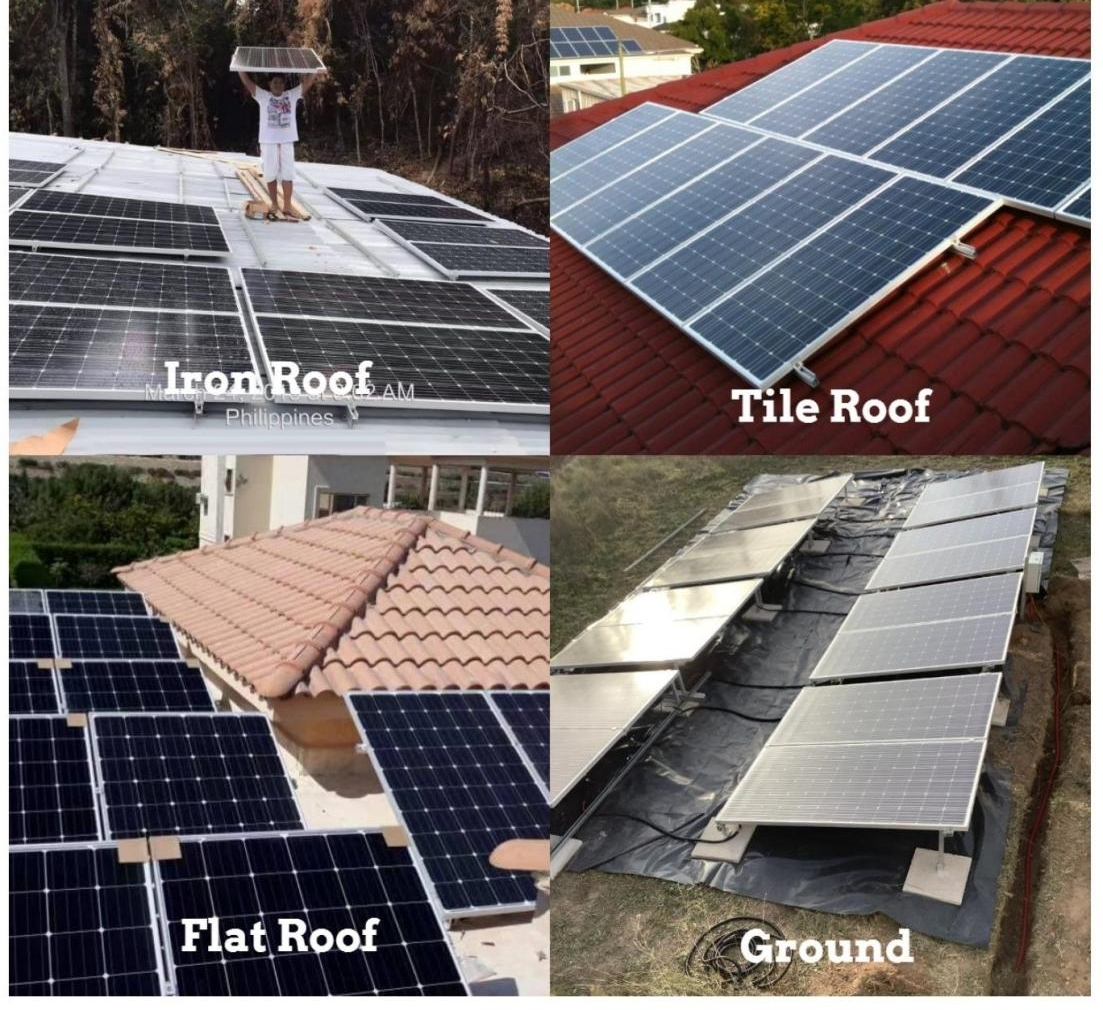
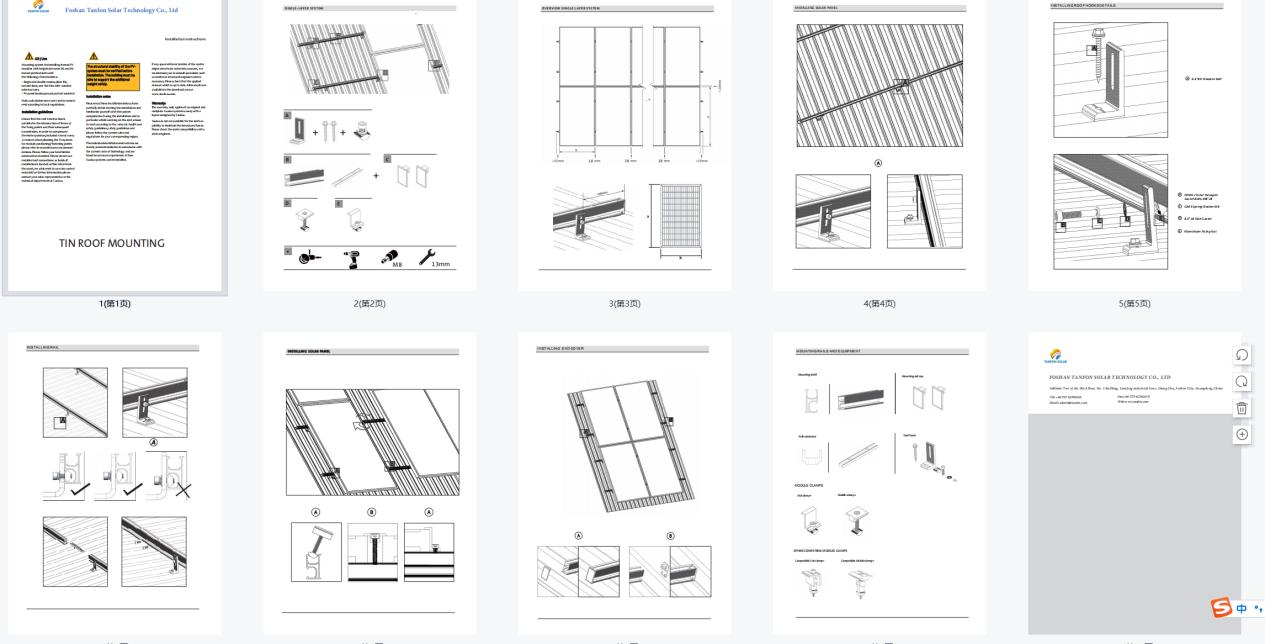
The first step is to put up solar panel bracket. It can be Roof-ground mounts or for ground. And different bracket for different roof top.
For country in the Northern Hemisphere, the best direction to face solar panels is south. For countries in the Southern Hemisphere, the best direction is North.
Here is 4 types most common solar panel bracket.
When you put up the solar panel bracket, make sure all the bolts and nuts is tighten up.Because you don’t want the solar panel fall down.
And here is the detail for the iron roof solar panel bracket.
Step 2. Solar panel wiring
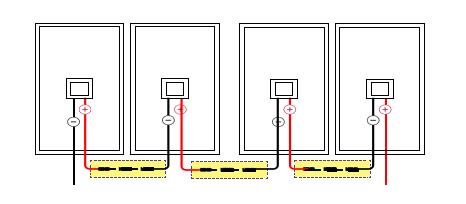
Next step is to do the electrical wiring for the solar panels.The PV cable can be connect to different solar panel by MC4. Which is include in our accessory, when you receive, you can pick them up.For the 5kw solar power system, there are 12pcs solar panel.How to connect those solar panel?
In the 5kw solar system, there are 12pcs solar panel.Connect way should be each 4pcs in series, 3 in parallel.
It's okay you don't know what is in series and what is in parallel.Just follow our photo and do the installation step by step, and contact us if you don’t understand the meaning.
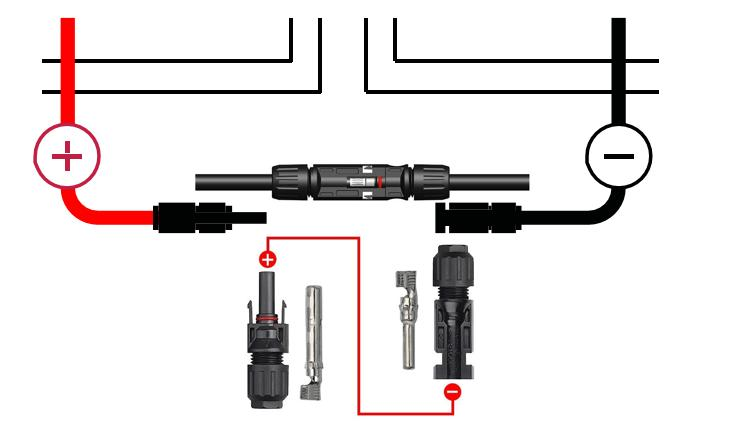
And here is the connection video for the MC4.MC4 connectors are used because they are suited for all types of solar panels. Make sure to shut off all the breaker during the wiring installation.
This is a really great video showing how to do the connection for the MC4.
Use PV cable for the solar panel wiring. Which is include in our accessory package.
- Double XLPE/XLPO installations.
- Over 25years life time.
Step 3. PV combiner wiring
Next step is to fix the solar panels with the mounting structure. This is done by tightening nuts and bolts. Care is taken to secure the whole structure properly so that it is sturdy and lasts long.
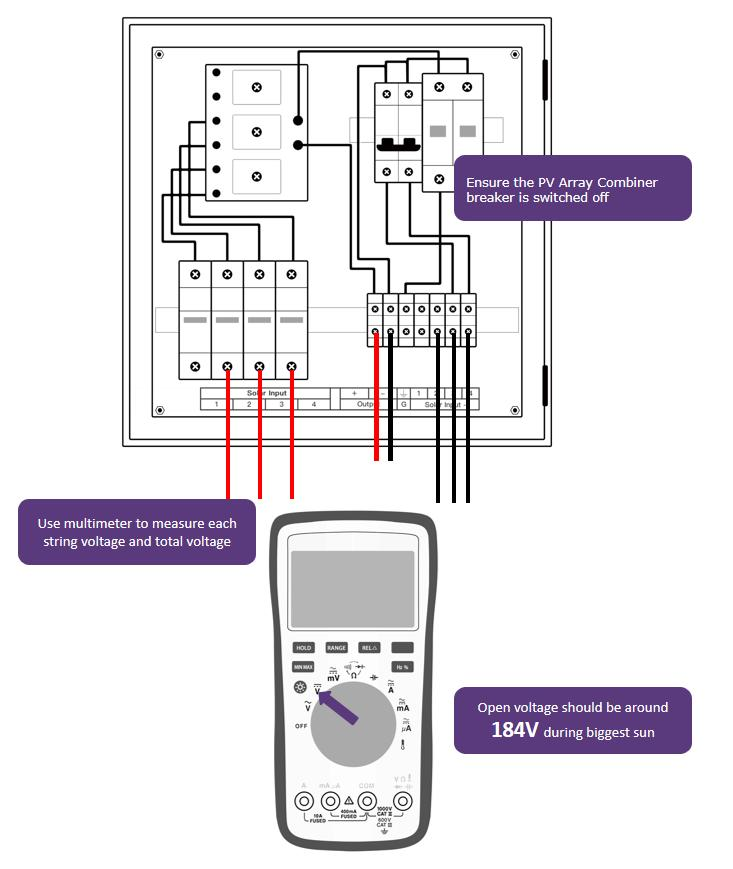
Connect the wire from solar panel to PV Array Combiner. Run the 4mm2 PV cables from the solar panels to PV Array Combiner, and cut it to length.
Ensure the PV combiner breaker is switch off, and use Multimeter to test each string voltage and total voltage.It should be solar panel open voltage around 184V.(solar panel Voc:46.8V X 4≈184V)
Step 4. MPPT Controller wiring
Make sure every breaker is off during the installation.
Step 5. Battery wiring
You will be wiring the battery bank up to 6pcs batteries, to create a 30.76Wh battery bank.
When wiring the battery cable, ensure that you fully attach each cable at both ends before moving onto the next.
Make sure every nuts and bolts is fasten.
Step 6. Install Solar Inverter
Connect the batteries via breaker to the inverter. The inverter usually installed near the main panel and better to put in in cool place. It should be indoor and well kept.
Usually there are 2 mode for inverter option. You can choose according to your need.
City first: In daytime, solar panel charge the battery. When city grid cut off, the inverter switch to use battery power.
Battery first: In daytime, solar panel charge the battery. Battery supply power. When battery power not enough, inverter switch to use grid power. When battery is fully charged, the inverter will switch to use battery power again.
Use Multimeter to test the voltage, and do not reverse the polarity, it will harm the battery and the inverter.
Connect AC input from grid and AC output for your home appliance.
Step 7. Start and Test Solar system
The final step is to turn on all the breaker in step and test the newly installed solar panel system. After that, the solar power system installation process is completed.
Solar Panel Maintenance
There are not much costs for the Maintenance solar power system. Once you have covered the installation, there are no moving parts and require little maintenance for the solar panel.
We suggest you check and clean your solar panel every season. Because if there are dirt in the solar panel, it will block the solar panel from absorbing the sun. And this may harm the solar panel.
We suggest clean the solar panel in early morning or at night. Using normal garden hose to wash the face of the panels. Also avoid spraying them with cold water while they are hot because that might damage them.
Battery Maintenance
Because battery is a very important in an off-grid solar power system. It’s necessary to maintain the battery on time.Check your battery every now and then to make sure its terminal connections are clean. Keep the area around batteries clean and dry.Monitor the voltage every 2-3 months.If one battery voltage drop a lot, pull that battery out and recharge it. But you should contact us first. And we will send you guidance accordingly. Don’t do that before letting us know.
And if you have any question, contact us in any time.
article source: https://www.fgreenpv.com/news/copy-benefits-of-using-a-battery-management-system/
Media Contact
Company Name: FireflyTree Greenpower Co., Ltd.
Email: Send Email
Country: China
Website: https://www.fgreenpv.com/


